How to change guitar strings is an essential maintenance task that every guitarist should know how to do. Regularly replacing old strings not only ensures optimal performance but also improves sound quality.
In this guide, we’ll walk you through the process of changing guitar strings, step by step, for both acoustic and electric guitars.
Whether you’re a beginner or an experienced player, this comprehensive tutorial will equip you with the knowledge and skills to keep your instrument in top shape.
Tools you will need to change guitar strings
Before we dive into the process of changing guitar strings, let’s make sure we have all the necessary tools at hand. Having the right tools will make the task way easier.
Here are the essential tools you’ll need:
- A new set of strings: Get your new set of guitar strings to replace the worn-out old strings you have. You can go for steel or nylon guitar strings, that part is up to you. I recommend using the same type of strings that came with the guitar.
- String cutters: These are specialized pliers or wire cutters designed specifically for cutting guitar strings cleanly. They have a sharp cutting edge that allows you to trim the excess string after installation. Using string cutters ensures a neat and professional-looking result.
- Peg winder: It’s a handy tool that makes winding the strings faster and easier. It is designed to fit over the tuning pegs and has a handle that you can turn, winding the strings more quickly than by hand.
- Clean cloth: It will be used to wipe down the guitar and keep it clean during the string changing process. A soft, lint-free cloth is recommended to avoid scratching the guitar’s finish.
These tools are readily available at music stores or online retailers that specialize in guitar accessories.
Now that we have our tools prepared, let’s move on to the next section and discuss when it’s time to change guitar strings.
When should you change your guitar strings?
Knowing when to change your guitar strings is important for maintaining optimal sound quality and playability. Here are some indicators that it’s time to change your guitar strings:
- Wear and tear: Over time, guitar strings experience wear and tear from regular use. Look for signs such as fraying, discoloration, or visible rust. If your strings appear worn or damaged, it’s a clear indication that they need to be replaced.
- Dull tone: As guitar strings age, they lose their brightness and clarity. If you notice a significant decrease in the tone quality of your strings, where they sound dull or lack sustain, it’s a sign that they have reached their lifespan.
- Intonation issues: If your guitar’s intonation, which refers to the accuracy of the instrument’s pitch up and down the neck, becomes difficult to adjust or starts sounding off, worn-out strings can be the culprit. Fresh strings will improve the overall intonation of your guitar.
- Reduced tuning stability: Old strings can have a harder time holding their tuning. If you find yourself constantly needing to retune your guitar, even after minor playing or bending, it may be a sign that your strings are no longer able to maintain proper tension.
- Playability changes: Over time, strings can develop grooves or become uneven due to the pressure and friction of your fingers against the frets. This can affect the playability of your guitar, causing discomfort or inconsistent string response.
- Frequency of use: The more frequently you play your guitar, the more quickly the strings will deteriorate. Regular gigging or daily practice sessions may require more frequent string changes compared to occasional players.
Remember, these are just general rules, and when to change your guitar strings can vary. It depends on things like how you play, the quality of the strings, and what you personally like.
Here is an article that will give you a better idea of how often you should change guitar strings.
How to change guitar strings for an acoustic guitar
Follow these step-by-step instructions to change the strings on your acoustic guitar:
Step 1 – Loosen the old strings
You can use a handy string winder or just twist those tuning pegs yourself to relieve the tension. Loosen ’em up enough so that you can effortlessly take them off the bridge pins and tuning pegs.
To remove a string, start by plucking it and then trace the string all the way to the tuning machine located on the headstock of the guitar.
Listen to the string as you are unwinding it. This will help you know whether you are winding it up or down. Remember, If you wind the string up it will snap.
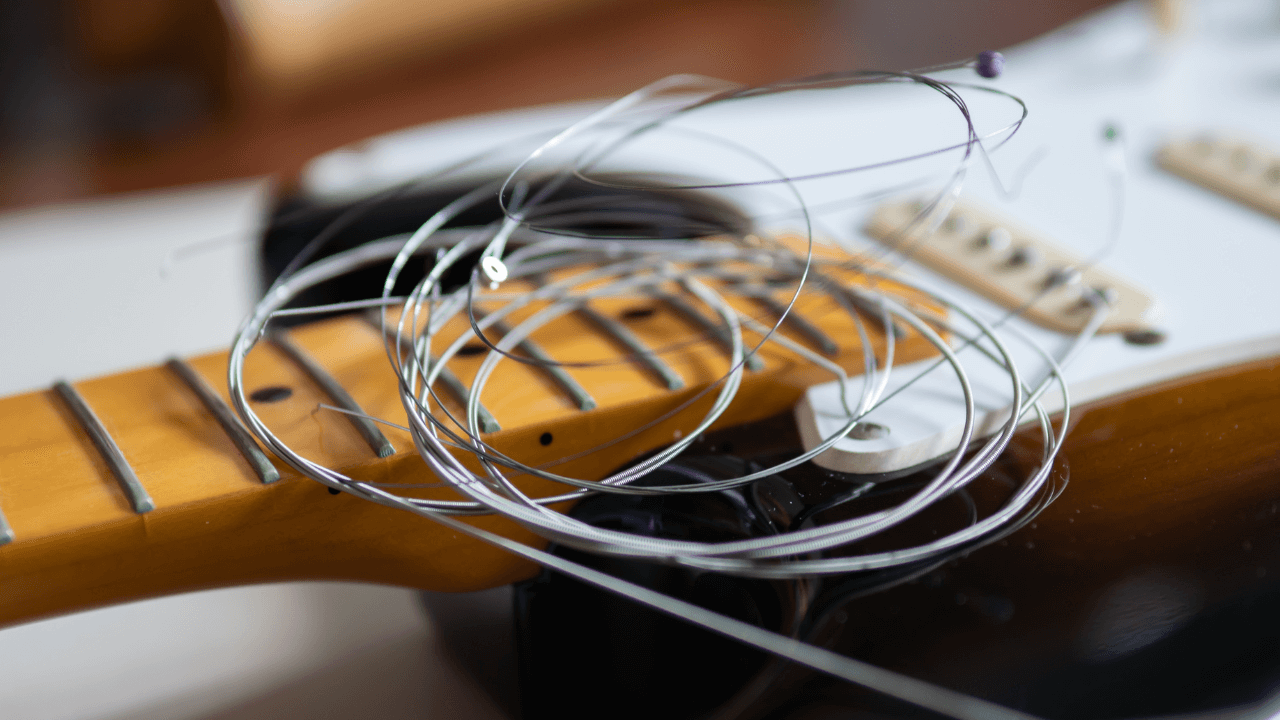
Step 2 – Remove the old guitar strings
Remove old steel strings: In the case that your guitar has steel strings do this:

In most steel-string acoustic guitars, the string wire is usually connected to a ball-end that is securely held in place by one of six small pins on the bridge.
To remove the string, you’ll need to take out the pin. A handy tool like a bridge pin puller is highly recommended as it does an excellent job of pulling out these pins.
However, there are also some acoustic guitars that have a pinless system. In such cases, you simply need to push in the opposite direction of the ball end to release the string. No pin removal is necessary.
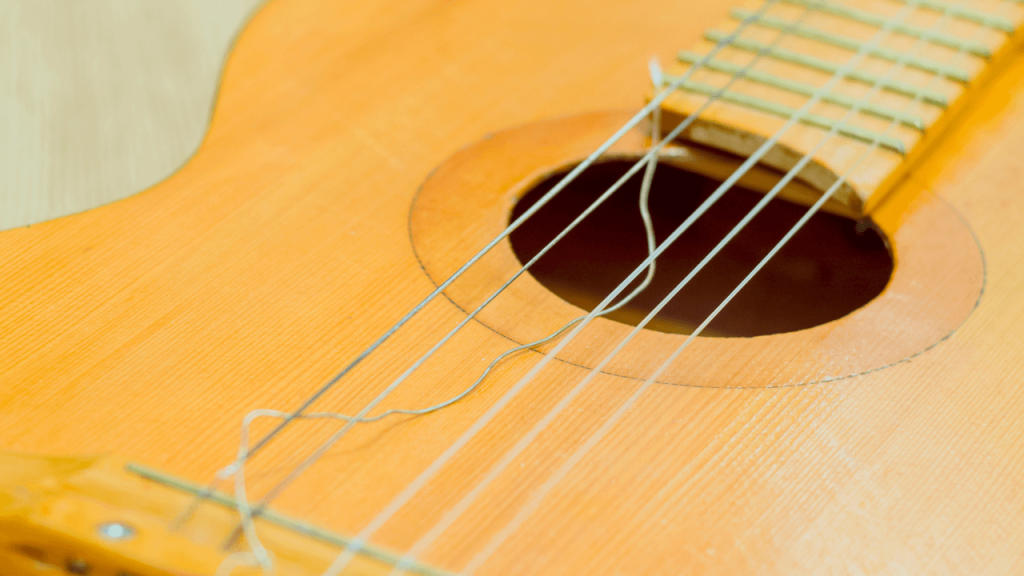
If your guitar has nylon strings, do this: In the case of nylon-string acoustic guitars, the strings are typically tied to the bridge by threading one end through and creating a small knot.

To remove the string, you can easily untie the knot by giving it a gentle pull after it has been detached from the tuning machine.
Step 3 – Clean the guitar (Optional but recommended)
Clean the guitar: Why not freshen up your guitar before putting on the new strings? Take a clean cloth and give the body, fretboard, and bridge a thorough wipe-down.
Clear away any accumulated dust or grime. This will ensure that the surface is nice and clean, ready for the new strings to be put on.
If you want to give your guitar a more thorough cleaning, read our article on how to clean a guitar.
Step 4 – Insert the new strings
Prepare the new strings: Get your brand-new set of acoustic guitar strings and uncoil them. You’ll notice that each string has a letter on it, telling you where it goes.
Start with the thickest string, which is the low E. Find the peg that matches up with it and unwind enough string to comfortably reach that peg.

Inserting the new steel strings: Start by removing the bridge pin for the low E string. Take the ball end of the string and insert it a few inches into the hole. Don’t worry about how far it goes because you’ll tighten it in a moment.
Now, locate the grooved slot on the bridge pin. This groove is where the string should rest. Insert the pin into the hole with the groove facing the neck of the guitar. Hold the pin down and pull the string up all the way.
Keep an eye on the pin as you tune the string because it may pop out occasionally. You don’t need to push it forcefully into the hole. Once the string is wound and under tension, it will keep the pin in place.
If your guitar has a pinless bridge, simply feed the sharp end of the string through the hole towards the guitar neck, and you can proceed to the next step.
Inserting the new nylon strings: Using ball end strings is highly recommended as they save a lot of time. All you have to do is slide the pointy end through the hole and tighten it up.
However, if you’re using regular nylon strings, you’ll need to tie a new knot. One end of the string should be more flexible. Thread that end through the top hole on the bridge and wrap it around itself a few times.
Now, by pulling the other end of the string, you should be able to pull the twisted part of the knot over the 90-degree edge of the bridge. The knot is mostly formed by the pulling action on the other side of the string.
This task can be a bit tricky, and you may find it helpful to watch a tutorial on YouTube for further instructions.
Step 5 – Wind the new guitar strings
Wind the new guitar strings: Now that the strings are all set up on the bridge, it’s time to guide each one through its matching tuning peg. Give yourself some wiggle room by leaving enough slack in the string for winding. Take the string and start winding it onto the peg, turning it in a clockwise direction.

If you want to speed things up, grab a string winder. It makes the whole process faster and smoother. As you wind, make sure the string wraps around the peg nice and tidy. Keep it even and neat. You’re almost there!
Do this for all the strings on the guitar.
Step 6 – Tune the guitar
Tune the guitar: Now that all the strings are on and wound up, it’s tune-up time! Grab a tuner or listen to another instrument that’s already in tune to get the right pitch.
Begin with the thickest string and slowly tighten it up until it reaches the desired note. Keep going, tuning each string one by one, until your guitar is totally in tune.
Keep in mind that it might take a few adjustments and tweaks to get everything just right. But once you’ve nailed it, you’ll be ready to rock!

Step 7 – Stretch the strings and retune if necessary
Stretch and retune: Once you’ve done the first tuning, give each string a little gentle tug away from the guitar body. This stretching action helps settle the strings and reduces how much they’ll stretch later on.
Don’t worry if it makes them go slightly out of tune again. Just retune the guitar as needed to get everything back on track. It’s all part of the process, and you’re doing great!
Here are two videos on how to change guitar strings on an acoustic guitar. This is to help the more visual people. There is one video for a steel string guitar and another for a nylon string guitar.
How to change guitar strings for an electric guitar
For electric guitars, the string changing process is slightly different. Here’s how to change the strings on an electric guitar:

Step 1 – Loosen the old strings
Loosen the old strings: Start by turning the tuning pegs or using a string winder to loosen the tension on each string. Loosen them enough so that you can easily remove them from the tuning pegs and bridge.
Step 2 – Remove the old strings
Detach the old strings: When it comes to electric guitars, the method of stringing the instrument through the bridge can vary.
On a typical Les Paul, the string is often threaded through a hard-stop tail.
On the other hand, on a Strat, it is fed in through the back of the guitar. In the case of the Strat, you may need to flip the guitar over to locate where the string goes in. Regardless of the specific method, simply pushing the string in the opposite direction will remove it.
Occasionally, a string may get stuck inside the guitar. If this happens, you can solve the issue by cutting a small piece from one of the thicker strings and using it as a reamer to push out the stuck string from the other side.
Step 3 – Clean the guitar (Optional)
Clean the guitar: Before installing new strings, take the opportunity to clean your guitar. Use a clean cloth to wipe down the body, fretboard, and bridge, removing any dust or debris that may have accumulated. This ensures a clean surface for the new strings.
Step 4 – Insert the new strings on the electric guitar
String the guitar: Installing most electric guitar strings is as simple as pulling the loose end through a designated hole.
Take your new set of electric guitar strings and uncoil them. Starting with the thinnest string (high E), insert one end into the corresponding bridge saddle.
Pull the string through until you have enough slack to wind it around the tuning peg comfortably.
Step 5 – Wind the new strings
Wind the strings: With the strings attached to the bridge, carefully guide each string through the corresponding tuning peg.
Leave enough slack in the string to allow for winding. Start winding the string onto the tuning peg in a clockwise direction.
Use a string winder to make the process faster and more efficient. As you wind, make sure the string wraps neatly and evenly around the peg.
Step 6 – Adjust bridge saddles
Adjust bridge saddles and intonation: Once all the strings are attached and wound, it’s important to check the bridge saddles’ position and adjust the intonation if necessary.
Use the bridge saddle adjustment screws to align the strings properly and ensure even spacing between each string. If needed, make intonation adjustments to ensure accurate pitch up and down the neck.
Step 7 – Tune the electric guitar
Tune the guitar: After the strings are in place and the bridge saddles and intonation are properly set, it’s time to tune your electric guitar.
Use a tuner or reference another tuned instrument to ensure accurate pitch. Starting with the thinnest string, tighten each string gradually, tuning it to the desired pitch. Continue tuning each string until your guitar is fully in tune.
If you are more of a visual person, below is a video that explains how to change guitar strings on an electric guitar.
How to make guitar strings last longer
To extend the lifespan of your guitar strings and reduce the frequency of replacements, consider the following tips:
- Wipe down your strings: After playing, use a clean cloth to wipe down the strings thoroughly. This removes oils, sweat, and dirt that accumulate during playing. Wiping the strings helps prevent the buildup of grime and extends their lifespan.
- Wash your hands before playing: Before you pick up your guitar, wash your hands to remove any dirt, oils, or other substances that can transfer to the strings. Clean hands minimize the transfer of debris and oils, which can corrode the strings over time.
- Avoid excessive bending: While string bending is a common guitar technique, excessive and aggressive bending can put unnecessary strain on the strings. Try to strike a balance between expressive bending and maintaining the integrity of the strings. Excessive bending can cause them to break more quickly.
- Use string lubricant: Applying a high-quality string lubricant or conditioner can reduce friction and prolong the life of your strings. These products create a protective barrier against moisture and corrosion, keeping your strings in better condition for longer.
- Store your guitar properly: When not in use, store your guitar in a suitable case or on a guitar stand. Protecting it from dust, humidity, and temperature fluctuations helps prevent premature corrosion and wear on the strings. Additionally, avoid leaving your guitar in direct sunlight or in extreme temperature environments.
- Trim excess string length: After installing new strings, trim the excess length from the tuning pegs. Excess string length can cause unnecessary vibrations and interfere with tuning stability. Use string cutters to neatly trim the excess string, leaving just enough to wind around the peg.
- Use a string cleaner: Occasionally, use a string cleaning product specifically designed for guitar strings. Apply it to a clean cloth and wipe it along the length of each string. This helps remove dirt and grime, extending the life of the strings.
- Consider coated or treated strings: Coated or treated strings are designed to resist corrosion and last longer than standard strings. While they may be more expensive, they can provide extended playing life and maintain a brighter tone for a longer duration.
Common string-related issues
Troubleshooting common string-related issues is an essential skill for guitar players. Here are some common problems you may encounter with guitar strings and how to address them:
String breakage: String breakage can occur due to various reasons, such as old age, excessive bending, or sharp edges on the guitar’s hardware.
To prevent string breakage, ensure that your guitar’s bridge, nut, and tuning pegs are free from any rough or sharp edges.
If a string breaks, replace it with a new one of the same gauge and follow the string changing process outlined earlier.
Tuning instability: If your guitar struggles to hold its tuning, there may be several causes. One common issue is insufficient string winding around the tuning pegs. Ensure that the strings are properly wound, with at least three to four wraps around the peg.
Additionally, check that the strings are correctly seated in the nut and bridge saddle. If tuning problems persist, consider having your guitar professionally set up.
Fret buzzing: Fret buzzing occurs when a string vibrates against a fret, resulting in an unwanted buzzing sound. This issue can be caused by a few factors, such as low string action or uneven frets.
Adjusting the guitar’s truss rod, raising the action, or having a professional fret leveling and setup can help resolve fret buzzing issues.
Intonation problems: If your guitar’s intonation is off, meaning that the open string is in tune but the higher fretted notes are out of tune, you may need to adjust the intonation. Each string has an adjustable saddle on the bridge that allows for fine-tuning the intonation.
Use a reliable tuner to compare the pitch of the open string to the 12th fret harmonic and the 12th fret fretted note. If there is a significant discrepancy, adjust the saddle position to achieve accurate intonation.
String slippage at the tuning peg: Occasionally, strings may slip at the tuning peg, causing them to go out of tune. To address this, ensure that you have enough wraps around the tuning peg, providing adequate friction to hold the string in place.
Additionally, check that the string is properly seated in the peg slot before winding.
Uneven string volume: If you notice that certain strings are significantly louder or softer than others, it could be due to imbalanced pickup heights or improper string-to-pickup distance.
Adjust the pickup heights according to the manufacturer’s recommendations or consult a guitar technician to ensure balanced string volume.
Dead or muted strings: If a string sounds dull or muted, it may be due to a buildup of dirt or corrosion. Clean the strings using a string cleaner or wipe them down with a clean cloth to remove any grime. If cleaning doesn’t restore their tone, it may be time to replace the strings.
Remember, troubleshooting and resolving string-related issues may require some trial and error. If you encounter persistent problems or are unsure how to address them, don’t hesitate to seek guidance from a qualified guitar technician or luthier. They have the expertise to diagnose and resolve more complex issues effectively.
By familiarizing yourself with these troubleshooting techniques, you’ll be better equipped to maintain your guitar’s playability and ensure that your strings perform optimally.
Conclusion
Changing guitar strings is a vital skill that every guitarist should possess. Regular maintenance and string changes ensure optimal performance and sound quality.
By following the step-by-step instructions provided in this guide, you’ll be able to change guitar strings with confidence.
Remember to pay attention to signs of wear, clean your instrument regularly, and take good care of your strings. With a well-maintained instrument, you’ll continue to enjoy playing and creating music for years to come.